Brushing Up On Creature Design Fundamentals
I feel like it’s been quite a while since I’ve done a well developed creature design even though it’s actually what I used to do more than anything! Seeing as it has been a while I wanted to really build my creature design knowledge and apply that to a project. Obviously there’s a ton of creature design tutorials, courses and information out there but I am the worst for constantly buying new tutorials and struggling to get through them all so I decided to make use of what I already had. One of the things I asked for as a Christmas present in 2023 was this Fundamentals of Creature Design book which I thought would be perfect to work through to refresh my skills. I spent the first day just reading through the book and making notes that I thought would be really useful in my own process and to overcome any bad habits I might fall into. I focused on just following the process that the book covered without introducing other tutorials or processes to keep it simple.
I’m going to go through what I did, what I learned from it and some tips of my own but I’d definitely recommend reading the book for yourself because you might work through it in a completely different way!
Stage 1 - The Brief.
The first thing I did was to make sure that I wrote myself a brief for the creature, describing elements like it’s diet, how it catches it’s prey, it’s environment, it’s weaknesses and it’s strengths. I also made sure to describe a little bit about the world it inhabits so that I could consider how other things within the environment might impact the creature and the way that it lives. I find that if I don’t do this it’s pretty much open for me to explore anything which might sound like a good thing but I think most artists know that having complete free reign can often be the worst! Setting a brief is really useful to give yourself those limitations and to help to keep yourself focused within a specific range of ideas, it also keeps your idea more consistent rather than just having the ability to keep adding random things to it.
Stage 2 - The Brainstorm.
I started by using the brief that I made to create a brainstorm answering key questions about the creature and the way it lives. I noted down any ideas or related words for each category. This then gave me a list of things to look into for the next step and essentially gives me a list of the areas I need to research into making the process much easier and more straightforward. You don’t have to create a brainstorm, however you do this is totally up to you, it could be a list, making notes on the brief itself or something completely different, there’s no right way.

Stage 3 - Research and Reference Gathering.
Using the brainstorm as a guide you can then begin research and reference gathering. Even if it’s just something as simple as knowing that your creature burrows, you can then:
Google animals that burrow.
Make a list of a couple of animals that seem relevant.
Do more research into each one.
Collect any relevant images and make notes.
Research and reference gathering is not just about image gathering, you also be reading into more detail in relevant areas, watching videos and getting any primary research where possible. Gather diagrams and anatomy images too, this is something I feel I should have done more of to inform my ideas as it definitely helps you to get a deeper understanding of animal anatomy. You don’t want to go overboard with how many images you add to your moodboard but it is worth considering making a moodboard of images for anatomy reference and a moodboard of images for functionality reference.
Stage 4 - Reference Sketching.
Using your gathered images do some studies from both your anatomy moodboard and the functionality moodboard to build up more understanding of how everything works. This will help you begin to understand how to translate it into your own designs. It’s also a good insight into where you need to do more research or studying, if you’re really struggling to recreate what your reference images or you feel like something looks off then it’s a good indication you might need more information about that particular thing or that you need to continue doing more studies. Below you can see a selection of my sketches and how I was studying more than just the overall animal, I did studies of specific parts of the animal especially those that are important to the functionality along with making notes and capturing how parts move etc.

Stage 5 - Ideation.
There’s no right way to do this but you should always be considering everything you’ve done so far (the creature description, anatomy, functionality etc.) not just drawing random ideas from your reference images or mashing two animals together. Play around with your ideas and have fun, try experimenting with: scale, proportions, functionality implementation, shape language etc. Start out by just getting something down, they might be pretty awful to start out with but the more ideas you get down the more you will start to get an idea of what works and what shapes and design ideas to repeat. I did a fair few pages of really rough sketches like the ones below but these were my favourite that I decided to take forward. As you can see some are really underdeveloped and just rough shapes but the idea is there and I can see something in it I like that I want to develop further. I knew I could work out the details as I continued with the ideation process. If you have something similar, now is a good time to pick a few and work out the rest of the design.

I then personally pick a couple from the selection that I’ve worked up further which I copy and paste a few times and then really try to push their proportions and scale to see what else I can come up with. Sometimes it doesn’t work but more often than not they are generally more interesting than the original.


I do think I got most of the elements in at this stage but there were a few things I overlooked like how the plating of the armour would work. Using a pangolin for reference was probably the wrong choice and something like an armadillo which has bigger overlapping plates may have been better. I also think I could’ve thought about the functionality in more depth rather than just popping a lure in there and have it work in the way it does from it’s original reference. I could’ve adapted it better to work how my creature could utilise it best - which sounds obvious really but these things are easy to overlook if you don’t constantly check back to your brief.

Stage 6 - Refinement.
It’s at this stage I begin to refine my idea so that I can begin the final render. I think it’s also important to consider what else you might need for your final creature/character sheets. I knew that this was purely to learn some new thought processes and creature design techniques rather than being for my portfolio so my end goal was just to design a creature. However, if this is for your portfolio you might want to include elements like turnarounds of the creature, any VFX or animation support and material call outs. This is a good time to plan any of that out and create some sketches for that too. Of course you don’t have to do it at this stage though, whatever works for you! Sometimes I will leave these things until last because I know I will likely change a few things in the rendering process if I notice an element doesn’t make sense for example.
What I’m covering in this blog post isn’t really about the rendering itself so I’m only going to cover that briefly but I will share some tips that I think are important when it comes to your rendering process. These tips can apply to any process you might use, it doesn’t have to follow my rendering process at all, these will help regardless.
Clean up your sketch early on - this doesn’t mean your sketch needs to be absolutely perfect but you definitely should be aware of how clean of a sketch you need to work from. For example I used to clean up my sketches so much to the point that there was no point in me doing line art but I did line art anyway because it was part of my style. On the flip side you will have people who don’t really clean up their sketch and then completely lose their way when it comes to rendering because they have no guide to follow. These days I know I can create my line art on top of a pretty rough sketch because I can quite easily connect the dots between a rough idea and how I want the final lines to look. However if I was trying a different process for the first time without line art I might clean my sketch up much further. If you’re someone that tends to rush into your rendering process and then feel lost about how to tackle it, take some time to tidy your sketch up first, it will be super helpful when it comes to making sure elements read and that your forms look 3D.
Flip your canvas often - I’m sure I’ve said this countless times before but flip your canvas a lot. If you’re sat staring at your image not knowing what to do next but you know something isn’t quite right, flip your canvas, you’re bound to see mistakes quickly!
Check your values often too! - I am someone who pretty much always goes straight to colour, I personally find it pretty difficult to work in values, it’s not that I can’t, it just takes me a lot longer. People will often tell you it’s best to start with values because if you values are right your colour will be too, which is definitely the right way to go but it certainly doesn’t mean you can’t start in colour. If you want to start in colour, just make sure to have a way to constantly check your values as you’re working. I do this by adding a layer on top of everything, fill it with black and set it to colour. I can then switch this on and off as I work to check my values and adjust, it works great and has definitely helped me improve my values overall. Funnily enough for this project though I did actually start with values for a change to try and challenge myself, so more about that….
Seeing as this project was mostly about learning some new things I decided that I wanted to try and render the majority of this creature with values and gradient maps. I’ve seen a fair few artists who’s work I really admire do this so I wanted to give it a go myself. As usual, I started out with my trusty line art which I always find so therapeutic to do, no matter what the final style of the work I think I’ll always have to get line art in there just to give myself a treat in the process haha!

Once I’d got the lines down, I laid some flat values down and separated each element onto it’s own layer just so I could easily edit the values until I got a nice read. I then added some very slight texturing with different brushes to give me a good basis to work on and rather than purely just painting in values I followed a little of my usual process here to make it a bit easier on myself and because I knew it would also work. I added in my shadows with a multiply layer and the highlights with an overlay layer, doing this gave me a really nice base I could work from and provided me with shadow and highlight values to pick from. I then made a new layer on top and began doing a paintover of all the additional details and lighting.
I’m not fully happy with the value painting for this however, I am happy with it in terms of my ability to paint in only values and I know I’ll do better next time so I’m holding onto those small wins rather than beating myself up about it! Once the value painting was complete I was able to start creating masks of the separate elements that I knew would be different colours eg. the skin, the shell and the eyes, this made it super easy for me to add gradient maps to each area and change those gradient maps to create some different colour options.

Using some real world reference of different animals from the dessert I was able to put together some different options for me to choose from. It is definitely a little more difficult to choose when you are your own art director so I did send this over to some friends in the industry for feedback but ultimately I was making the final decisions based on what I thought was best for the brief. My best advice when you’re having to make these kinds of decisions yourself is to step away for a day or two and to not make these kinds of decisions too quickly, have a think and come back with fresh eyes.
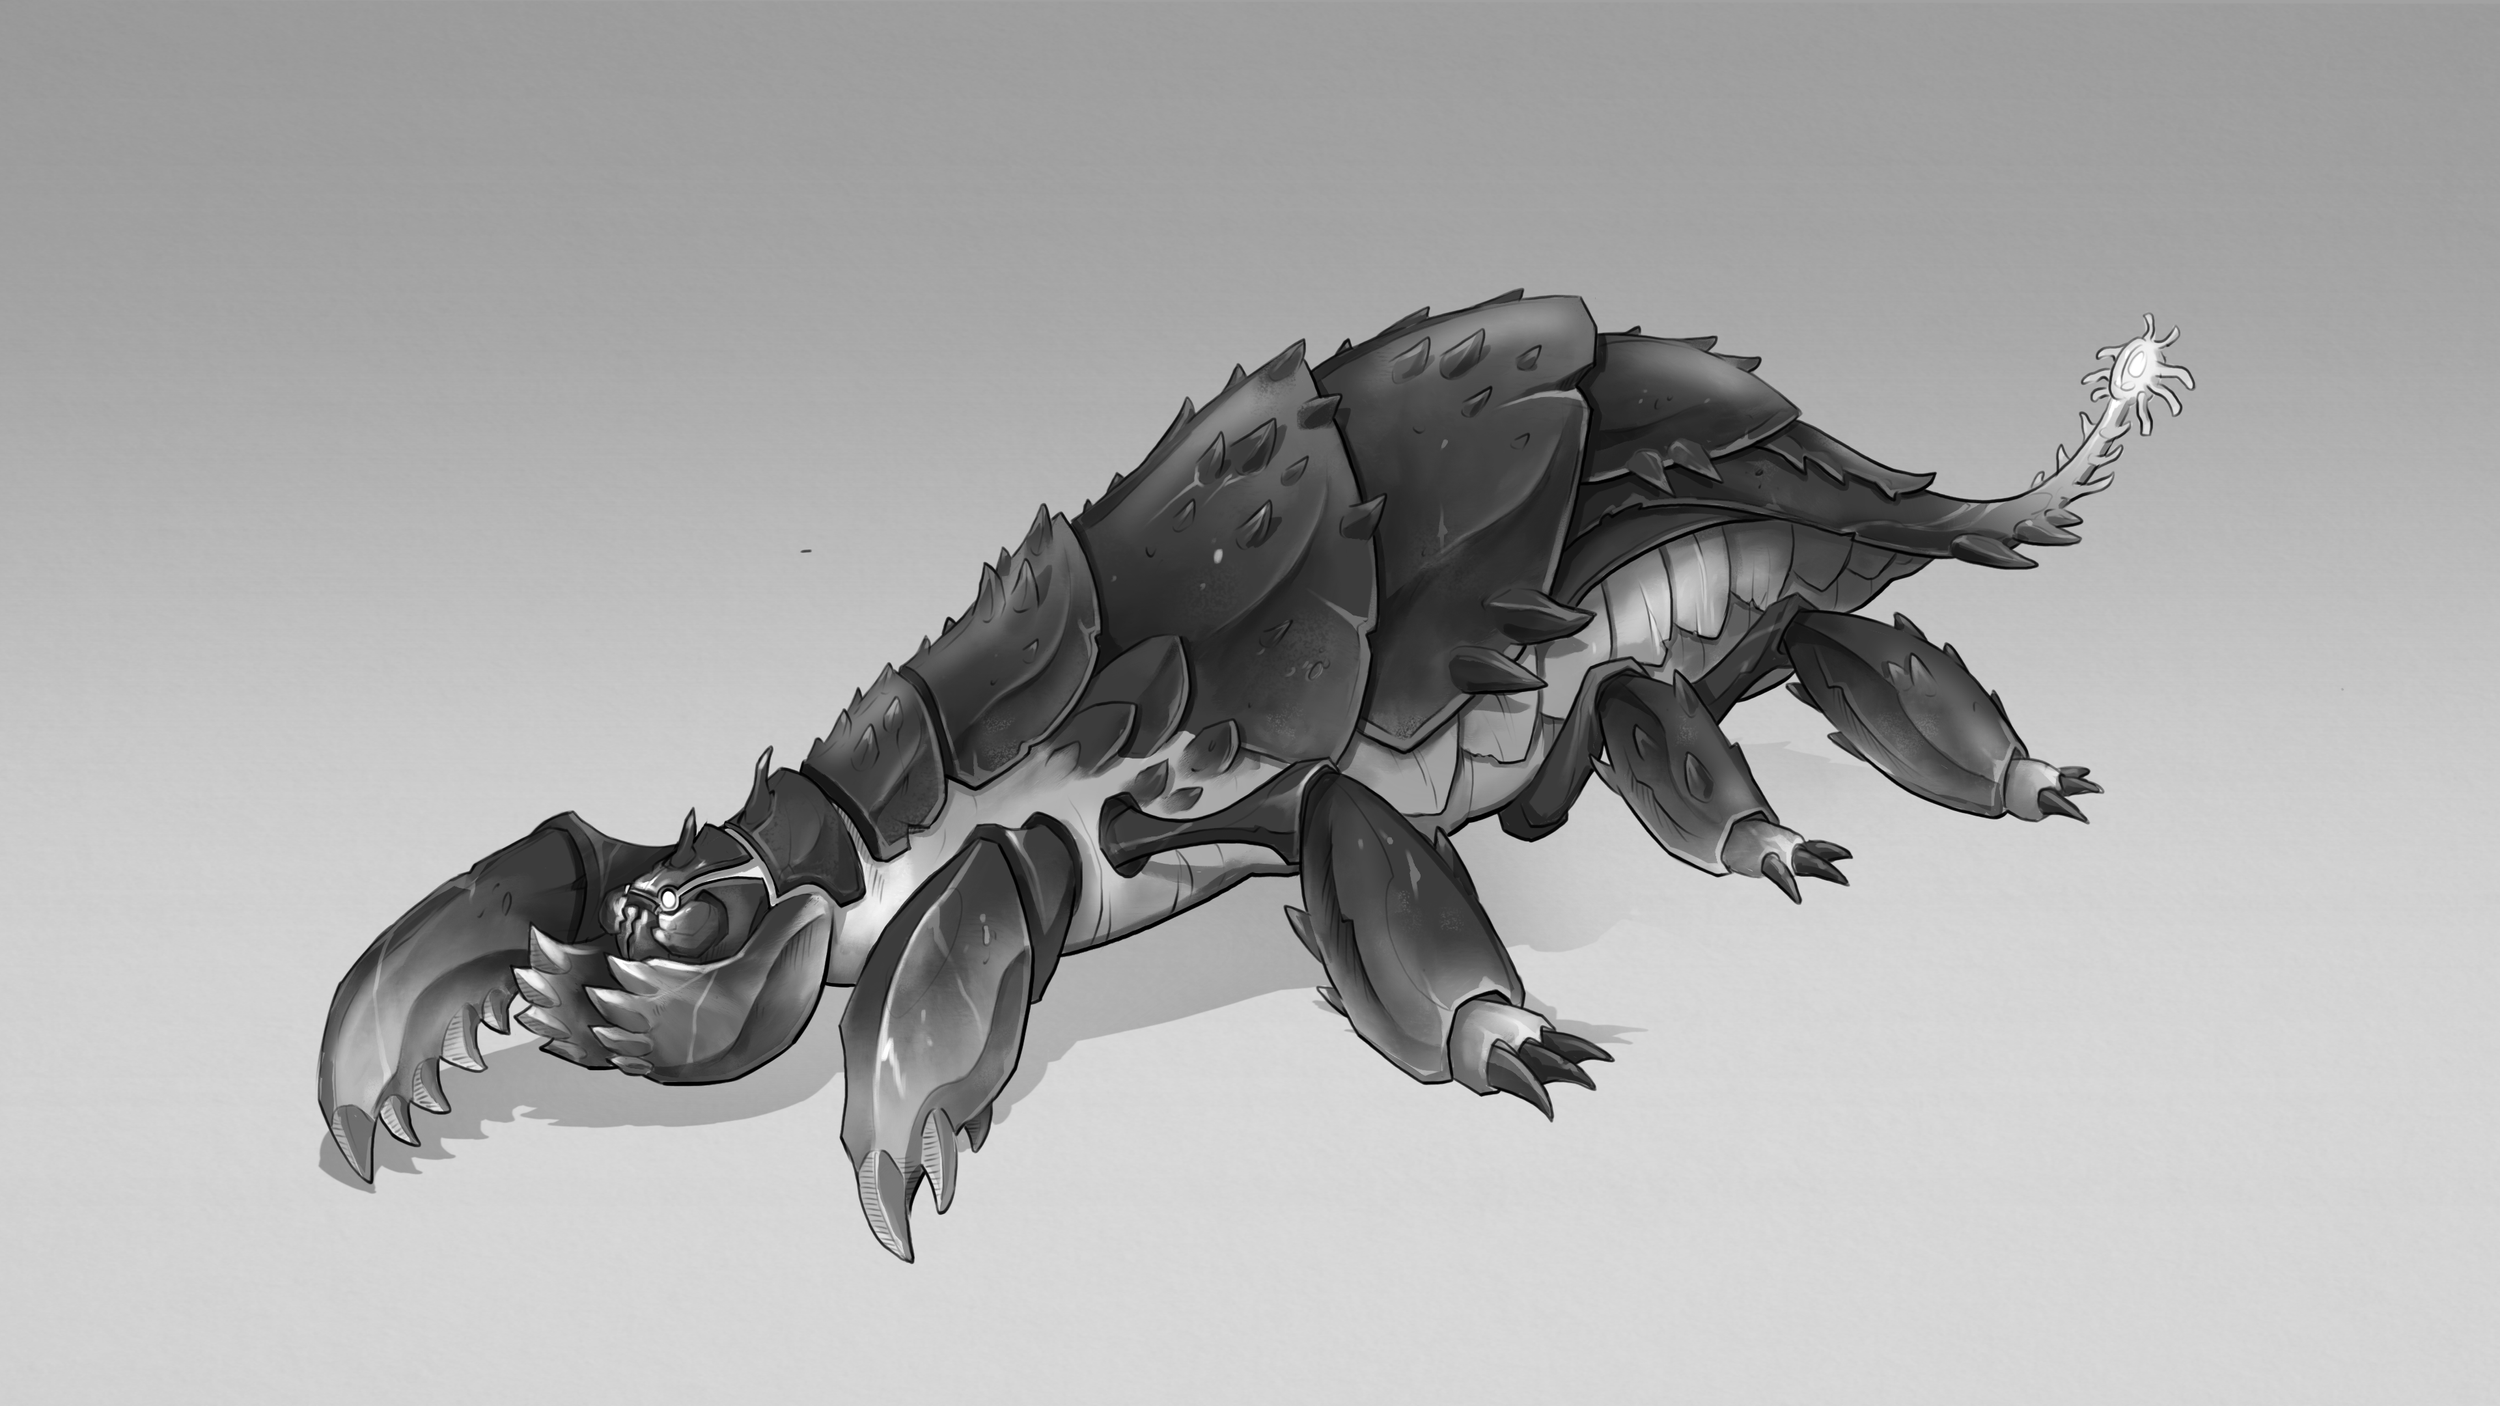
Here’s the final result! It feels quite different to what I usually do, for me at least but it was a lot of fun and definitely made me think about creature design differently. Looking forward to being able to tackle another one!
